The gorgeous floral print by Fotini Tikkou is one of the 14 print templates that comes with our book. We used Fotini’s print to teach y’all about color theory, it was perfect for that. When I printed this for the maxi dress hack of our Bobbinhood pattern so many of you asked how to align this fragile print. In this blogpost we’ll explain how to print it. Let me say this first: It is NOT easy, it is definitely a complex print, for advanced printers. If you are just beginning, choose any other project from the book to get you started and work your way up to this one. That way you will grow confidence and won’t get frustrated!
Normally we always say that you don’t have to align your print on your stencils, since we always ‘eyeball’ different layers it is not necessairy to cut every layer exactly on top of the other.
Because this print is so fine, it is impossible to eyeball we HAVE TO cut them out EXACTLY on top of each other. With this I mean, if you would place all 4 cut stencils on top of eachother, they fit exactly. If we do this right all you have to do is know where to place your screen.
Ok ready? Lets print that floral!
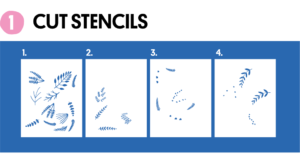
Cut all the stencils perfectly aligned, so that when you place the stencils on top of each other they are all in the right spot.
+ extra tip alert! Make sure you have a real size print out of the floral and cut it out all around, (why you ask? You’ll see and thank me later :)).
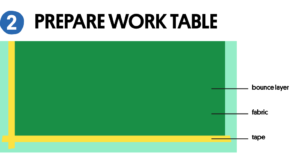
Wash, iron and place your fabric on your table, make sure you have a bounce layer (see page 43 of our book) underneath the entire fabric you want to print.
Tape the fabric to the bounce layer. Make sure the tape is nice and straight, you will need this to align your screen later on.
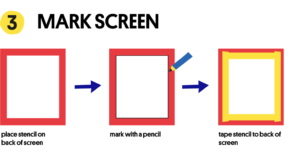
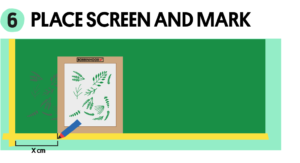
Place the first stencil on your screen and mark the position with a pencil so later on you can place your other stencils at the exact same spot. Tape the stencil to your stencil.

Place your screen, aligned to the tape. Print away!
Blow dry really quick.
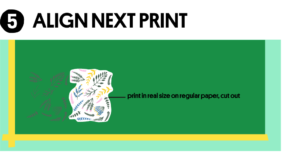
Get that real size print-out you cut out and place it next to the first print on the right spot.
Place the screen over it. Mark that spot as indicated.
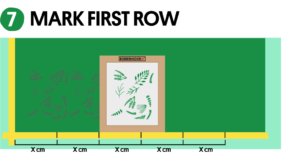
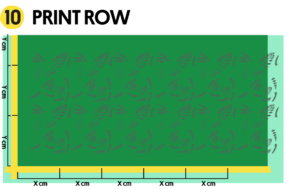
Measure distant X and make marks with the same distance right to the end of the fabric. Now you know exactly where to align the left side of the screen. Don’t forget to blow dry quickly after each print.

Grab your real size print out again and place it for the first print of the second row.

Use it as a guide to place your screen. Take the print out away.
Mark the bottom of your screen. Print.
Use the same distance you used before (X) to place your screen sideways. And the hight you measured (Y) to determine the exact position of your screen. Might seem hard, but it aint. 🙂
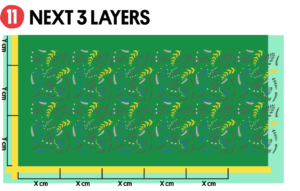
Use that pencil mark you made on the back of your screen in step 3 to tape all other stencils to your screen. Repeat step 7-11 for all other layers and print away! And yes, at the end celebraaaaate.
I won’t sugarcoat it, this is a very hard print. The good news is though that even miss prints look gorgeous with this design, so no worries 😉
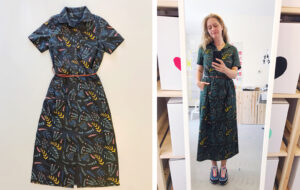
I made my fabric into this free maxi dress, a hack of our Bobbinhood suit pattern!
The fabric I printed on is a gorgeous gaberdine twill by see you at six fabrics (not sponsored just happy).
Can’t wait to see your floral print! Show us and inspire @bobbin.hood #wearebobbinhood