Woohoo congrats on your Bobbinhood recycled plastic mini screen print screen! Wow that’s a mouthful, haha! We are so proud that our mini screen 2.0 is now even more sustainable. Made locally, out of recycled plastic and without the nasty glue! Now all there’s left to do, before you start your screen print adventure, is to assemble the screen. Everything you need is included. Put your favorite music or podcast on or watch the video’s in silence. It’s up to you.
The mesh of this screen is replaceable. Which is awesome but we would like to encourage you to make the mesh last as long as possible. Take good care of your screen and clean it as soon as you’re done printing. Use cold water only and your screen will last a long loooong time. In the unfortunate case that your mesh gets clogged our damaged, simply take the screen apart and replace the mesh. We use 39T mesh for our screens.
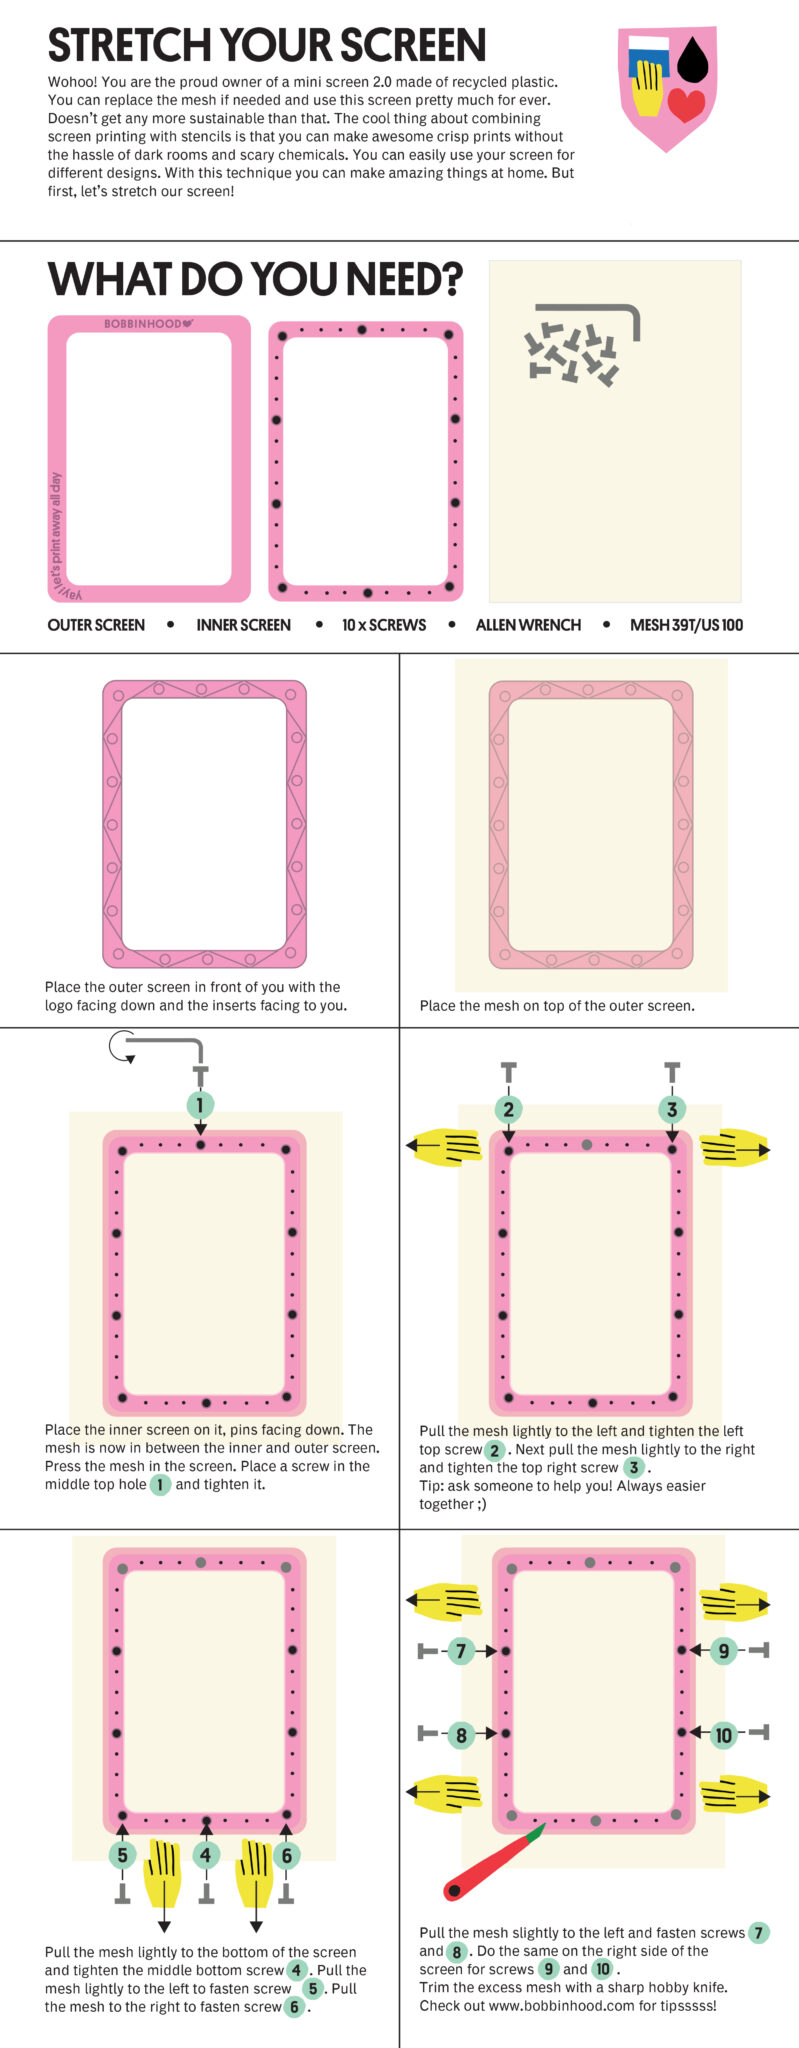
Don’t feel like watching video’s or you’re just too excited to get started? Here’s a quick overview of the steps you need to take to stretch & assemble your screen.
DOWNLOAD YOUR MANUAL HERE
Now you’re all set to start your screen print adventure ✨ Our manual is available in 5 different languages! You can download the manual of your choice below. We’ll guide you through it step by step and you’ll be printing your own designs in no-time! Need some inspiration or visuals of how it’s done? Make sure to check our Instagram 🌈 You can also subscribe to our newsletter for free templates & updates.