Hi y’all!
This gorgeous stencil is made by Vicky from in the Wonderkamer (which translates to: In the room of wonders). I met Vicky last year as I coached her and her amazing company that specializes in amazing art courses for kids (my kids loooove them). After some months we decided to work together on a course for adults to help Unleash your Creativity. We made this course because too many people told us they were either not creative or didn’t have time for creativity in their life. We are here to second that! We believe neither of those statements to be true. Everybody is creative and everybody can make time to be creative! This resulted in a 8 week course with fun assignments designed by Vicky to help you Unleash your Creativity, I will guide you through it with a weekly podcast, there are 5 cute workbooks aaaaand two life zoom sessions. We will also create a community! The program starts the 1st of February! (Doors will close the 24th of January).

The cool thing about this print (you can find the freeee download in this newsletter) is that it is a very versatile one. You can either just print the outlines or fill in any part you like. When my littlest asked me to make her a sweater I decided to fill in the flower crown and the lips. If you followed the process on Instagram, it was quite the journey because I made a mistake in the printing process: I forgot to place one cut out and then it looked like Frida was wearing a turtle neck! Y’all helped me convince that a turtle neck was exactly what she would wear 😉 So I adjusted the print and I am so happy how it turned out!
But without further ado let me show you in steps how to cut these stencils.
You can find the free template in this newsletter!
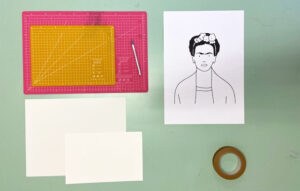
What we need:
You can print Frida with any size screen you want. I decided to print the outlines with our mega screen and to fill in the flower and lips, I used a maxi screen.
I used 1 mega stencil and 3 maxi stencils, I will show how you can use the stencils for different layers so you can use them to the max! Also you will need a cutting mat, a sharp hobby knife and a print out of your template in the right size and while you are at it, print two, I’ll explain later!.
Ok let’s get started! If you want the flower crown in color decide what should be what color first. Mark it on your template. I started cutting everything I wanted to be red first, her lips and a flower. Place the template on you stencil, tape it down so it doesn’t move and start cutting the flower and lips. Remember, you will be printing everything that’s black. Keep the cut outs: the inner parts of the lips, the inner part of the flower, you will need those later on (you can thank me later ;)). When you are done cutting, write on your stencil the color you want to print it in.
Now cut out all the other flowers, as you can see on the foto I cut two layers on one stencil. Make sure there is enough space between the and you have room to print as well. You can find a full chapter on this in my book (we have a hardcover and an ebook!). Don’t forget to clearly mark what is what!

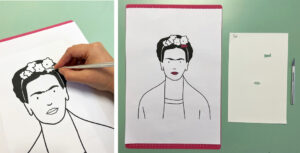
Next up is the fine line drawing. Might seem a bit daunting but you can do it! Let me give you some tips. I always like to start in the centre or with the smallest details. Start cutting all the black details away. So in this case I started with the details of the face and the outline of the face.

After this continue and go from the inside to the outside and slowly cut all the black parts away. Make sure to keep all the cut-outs, they are your best friends when you start printing! If you have to cut fine lines always press the part you just cut down with the ‘non-cutting’ hand. As you see me doing the picture. When you are all done, place the cut outs where they should be and admire your work! It is always a good idea to print the template again for reference. And now get printing awaaaay!!!!
Want to learn more? We have an amazing book in hardcover and as an e-book. Or follow our online course!
