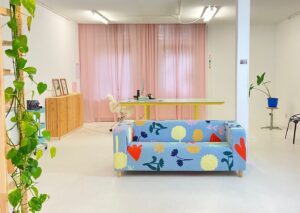
Making the Couch aka my biggest project ever.
I have always wanted a couch in my studio, printed by yours truly of course 😉 So when I got this old Ikea couch I loved the idea of upgrading it with a printed cover. It has been the biggest project I ever printed and I loved every second of it. Let me take you through the full process:
My initial idea was to buy a fresh and new cover for the couch and print that but then I remembered I had some dead stock light blue denim in my studio that seemed a good material for the couch: sturdy and no stretch. So I decided to use what I had instead of buying something new.
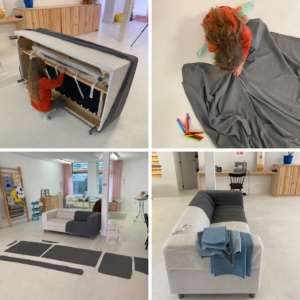
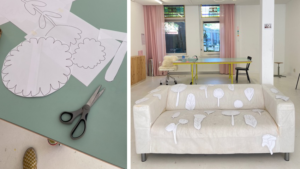
When Miss J had a day off school we made the patterns together. It is the kind of project she loves: measuring, cutting and writing on fabric with a marker :), perfect things for a 6 year old! First we cut the cover exactly in half, this way I would have one intact side to understand the construction and one side to cut up into the patterns. Miss J cut exactly on the stitching (she was soooo excited she got to use my fabric scissors!) and we wrote on every piece what part it was: armrest inside, armrest top, sitting area etc… Such a fun job to do together!
I washed the fabric to prevent shrinking later on and to make sure it was all clean for printing (sometimes invisible dirt can really ruin your print) and gave it a good iron. Then I cut out the pattern pieces. I could have done this later as well but at that point I was still convinced I was going to make the pattern continuous over the seems, I let that idea go later in the process and I am still very grateful I did (gotta kill your darlings sometimes!).
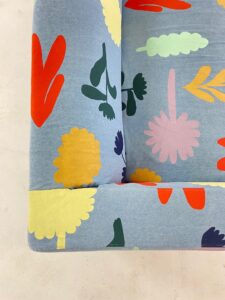
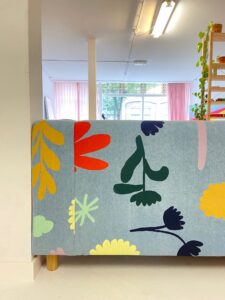
I took quite some time designing the pattern of the couch. I knew right away I wanted to use the flowers by Jennifer Bouron from our book (the printing template that comes with our book!) and I took my time to figure out the size and the direction of the flowers. At first I wanted them all in one direction and then continuous over the seems but it just didn’t work in real life. As soon as I could let the ‘continuous pattern’ go, things started to move forward. I was going to make it a ‘random but planned’ pattern. Random in the sense that there was no repetition in the print, planned in the sense that I was going to decide what the print would look like before I started printing.
I cut out all shapes true size, many times and decided on 7 colors. 3 standard Bobbinhood colors: Mint, Deep Blue and Gold and 4 mixed: Pastel Yellow, Dark Green, Rusty Red and Lavender Purple. You can find all these mixing recipes in our Mixing Monday blog!
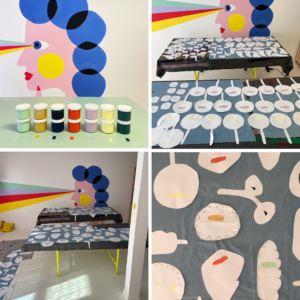
Then I color coordinated all the shapes so I could easily see the balance in the print. To make sure I didn’t print a whole lot of dark green shapes on one part and none on the other.
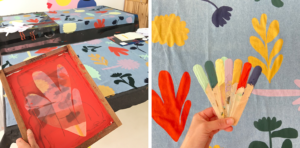
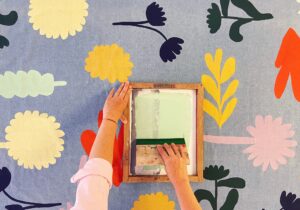
This is when the time finally came to print away. All the preparing took quite some time, totally intended because I gave myself the joy of a slow design process, I really wanted to enjoy the full journey, no rush whatsoever. All good things take time right 😉 The printing of course went super quick, it took me just over an hour to print all of it. Because I planned where what shape would go I could print all the shapes in the same color at once, without washing the screen (A fun trick to make printing life easy, I also talk about that in my e-course). I only washed the screen when I changed colors. I used both the mega and the maxi screen for both projects.
When all was printed I could sew the full cover, lucky me I kept one half of the cover as it was, so I could see the construction. Then I tacked the cover around the frame and changed the original legs for wooden ones. Project done, and here I am sitting on my very own handprinted couch, writing this blog! Wohoooo!